-
Noise Reduction Shootout
Well after seeing Tim’s test on noise reduction software, I thought I’d try one out myself. I’d never really compared different NR (noise reduction) processes before, instead I’d just basically given up high iso photography. I have to say, after mucking around with the software a little bit, I’m not so worried about using high iso settings on the DSLR anymore. I was quite impressed.
I only had 3 methods of NR which included DPP (Digital Photo Professional), Noise ninja, and “Camera RAW” with photoshop. I tried all on the same photo which I’ve taken a 100% crop sample of. I tried to include a mix of textures in the sample.
View the image below at it’s largest size and you immediately you notice each process produced quite different results.
The original photo was taken indoors with dim light. The digital noise isn’t that bad really, i have other photos that are worse, but I chose this as it had several different textures and is common of the iso noise I get.
Camera RAW seemed to keep the most “faithful” colours, but blurred pretty much everything. Some detail was lost particularly in the edges, which gave an overall soft look to the photo. It seemed to get rid of both noise and grain which are two different things really. By getting rid of some grain it lost a bit of sharpness and detail.
DPP was a little less full on when it came to removing the grain. It still has quite a bit which helps keep some overall sharpness. To my eyes it has a nicer contrast and colour too. I’d never used DPP before, but it looks to be quite effective.
Noise Ninja was again different. I downloaded the 400D (Rebel XTi) NR profile from the manufacturer website and gave it a go. It appears to be bit of a mixed bag. I like how it’s kept some edge sharpness, more than the other programs, but it makes the skin look like plastic. Some people might like that as bit of an airbrushed skin shortcut, but its not to my tastes. The colour has again changed from the original, probably the most drastic out of all. It was also introduced some of its own fragments to the image which look a little messy, this might be treatable in the setting panel which I didn’t play around with (I just used standard setting for all).
After looking at the 3 noise reduction programs, I have to say i quite like them all in one way or another.
I’d never used DPP before, but I liked how it treated the image. It still has some grain, but removes most of the digital noise which is what I want most. It had nice contrast i thought, and the colours looked fine too. The only downside is that there’s not many options for individual settings. So fine tuning is pretty much out of the question. (It almost seems as though it was bit of an after thought with the DPP software, but that’s another story).
Noise ninja seems very powerful with a large range of fine tuning options. I think once i play around with it I’ll be able to reduce the plastic skin look. The colours looked quite different from the original too, but that’s probably another thing that can be fixed also. The program seems to need a bit of fine tuning which is to be expected I guess. But the whole idea is to minimise hours in front of the computer, if I have to play around with NN each time I use it, I’ll probably lose interest. That’s just a personal thing though.
Then there’s Camera RAW which seems fine, but would probably be my last choice. It just seems to give bit of an overall blur to the image, which isn’t all that useful.I guess it all comes down to personal preference. If i can get Noise Ninja sorted out, I’ll use that the most. Otherwise I’ll go with DPP and its simplicity.
-
Silver SP
Well, the other week I was made an offer I couldn’t refuse. The offer was to buy another Olympus SP, but this time in Silver, for a very reasonable price. Actually, an extremely reasonable price. I wasn’t in the market for another camera, let alone another SP, but somehow I convinced myself I should get another one. =/
The SP on offer came with its original case and manual, but the best bit was that it had just undergone a CLA, plus it had a modification that allows it to take modern voltage batteries without any stuffing around. These two things alone would of cost more than what I ended up buying the camera for, so I was pretty pleased. I was about to send my black SP in for a CLA anyway, so this saved me the hassle, plus i can now leave it at home and not worry about scratching the thing (well that’s how I justified the purchase). The silver one is now my user, even though it is cosmetically and functionally flawless. (I would of been happy which a scratched up user, but who am I to complain?)
So anyway, here’s a quick picture of them together below :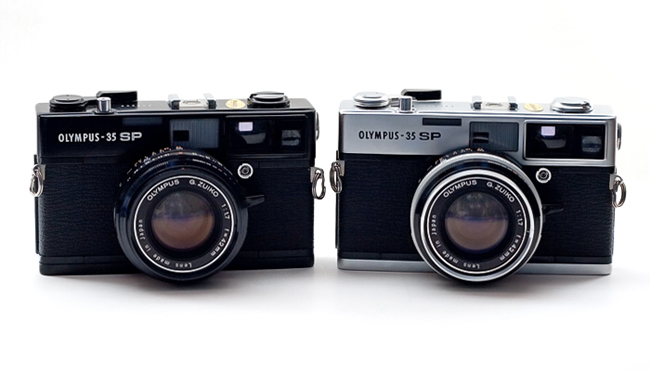
-
OM2n Light Seal Repair
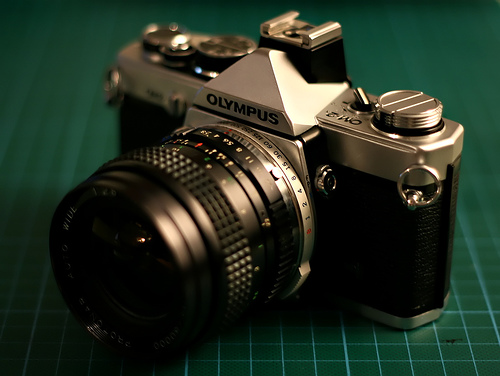
I’ve acquired yet another Olympus OM but this time the OM2n model. The one I have is in near perfect condition, with hardly any wear on the body at all. I doubt it has been used much in its life time so far, but that’s about to change!
Even though it was in such good cosmetic condition, the batteries and light seals predictably needed to be replaced. So I ordered some new silver oxide batteries (no the alkaline type), and then started my search for some new light seals. I stumbled on the kits made by Jon Goodman and ordered one after reading so many good reports. The light seal kit came today, so I really wanted to get started on it. This is how it went :
Below you will see a couple of pics of the old light seals. They have deteriorated quite a bit over time, and have just turned into black sticky muck basically.
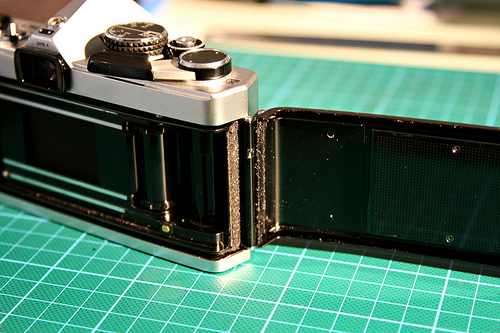
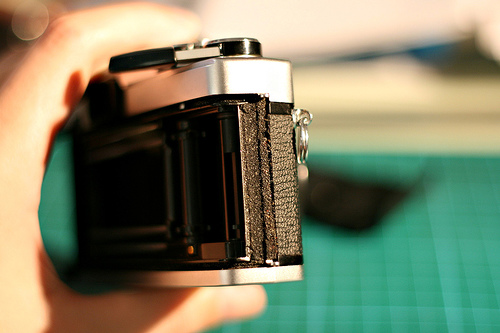
The first step was to remove the remaining old seals. This was done using solvent and this nifty little bamboo stick that came with the light seal kit. It didn’t come out as easy as I had hoped, and took quite a lot of time to scrape it all out. Next time I’ll use a slightly more powerful solvent.
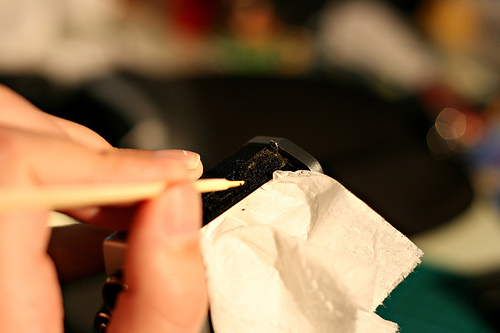
Next, I had to put the new foam light seals in. First I put in new rail slot on the back. Then a nice new fabric hinge seal. Both were very self explanatory to do.
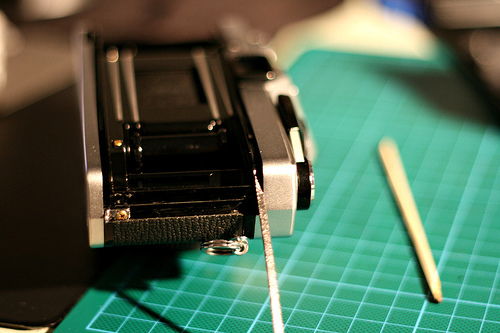
After that I had to move onto the hard bit, the mirror damper. This was actually really tricky for a couple of reasons. First of all, the area is physically quite difficult to get to, and it was hard to get any light in there to see what you were doing (I should of done it during the day with some natural light). The other difficult part was actually cutting the foam to size. Adhesive backed foam cut at 2mm wide is reluctant to retain its shape, and it’s easy to get a bad cut. Using a Stanley Knife I managed to get it first go, but there has to be a better way of doing it, something I’ll think about for next time. Below you can see one of the two “L” shaped pieces of foam I had to cut. It looks a lot easier than it was!
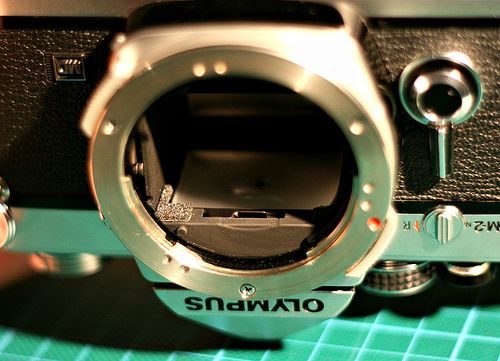
After the mirror damper was replaced the whole process was complete. As mentioned, it was mostly self explanatory and simple except for the intricate last step. You can comfortably replace all the seals in half an hour though and at a fraction of the cost of paying a camera store to do it for you. The kit from Jon Goodman was great. It contained everything needed (besides the Stanley blade) and there is enough foam left over just in case you make a mistake and need to tray again. Once you learn the principles you can apply the knowledge to a range of other cameras that may need light seal repairs. At the end of the day, all you’re trying to do is create a light tight box after all.